こんにちは、MLBお兄さんこと松村です。
先日の GitHub Universe 2025 のキーノートにて、GitHub Copilot coding agent が Self-hosted Runner をサポートしたことが発表されましたので試してみました。
GitHub Copilot coding agent とは
GitHub Copilot coding agent とは、課題(Issue)からタスクを整理し、Copilot が開発者として自律的にコーディングなどの作業を行う機能です。
2025年5月に発表されて以来、多くのアップデートが行われています。
Copilot coding agent についての詳細は、以下の記事をご参照ください。
Coding Agent がコーディングを行うときには GitHub Actions が動きますが、これまでは GitHub-hosted Runner が使用されていました。
ランナーとは、GitHub Actions のワークフローを実行するための環境のことです。
GitHub-hosted Runner は GitHub が提供するランナーで、利用者が環境を用意する必要がない便利なランナーです。
Self-hosted Runner とは
Self-hosted Runner とは、利用者が自分で用意したランナーのことです。
オンプレミスやクラウドサービスの仮想マシンなどにエージェントをインストールすることで、GitHub Actions のワークフローを実行できます。
Self-hosted Runner を使用することで、特定の環境や依存関係を持つプロジェクトに対して、より柔軟な対応が可能になります。
また、GitHub Actions の実行にかかるコストを削減できる場合もあります。(ランナーに使用するインフラのコストは利用者が負担する必要があります)
このような Self-hosted Runner において、 Copilot coding agent を実行することができるようになったのが、今回の発表になります。

リファレンス
Copilot coding agent の Self-hosted Runner サポートに関するドキュメントは、以下となります。
- Copilot coding agent now supports self-hosted runners - GitHub Changelog
- Customizing the development environment for GitHub Copilot coding agent - GitHub Docs
ドキュメントによると Copilot coding agent に使用できる Self-hosted Runner は、Actions Runner Controller (ARC) を使用して構築された環境に限られています。
Actions Runner Controller (ARC) とは、Kubernetes クラスター上で Self-hosted Runner を管理するための仕組みです。
そのため、現段階ではオンプレミスや単体の仮想サーバーでは Copilot coding agent を Self-hosted Runner として使用することはできないと思われます。
それでは実際に ARC の構築から試していきます。
ARC クラスターの構築
今回は Azure Kubernetes Service (AKS) 上に ARC クラスターを構築しました。
ARC クラスターの構築手順については、こちらのドキュメントに沿うことで簡単に構築することができます。
AKS クラスターの作成は省略しますが、ARC のセットアップは以下のように進みます。
なお、事前に GitHub の Personal Access Token (classic) を作成しておいてください。(スコープは repo と admin:org が必要です)
# AKS クラスターに接続
MY_RESOURCE_GROUP_NAME="<your-resource-group-name>"
MY_AKS_CLUSTER_NAME="<your-aks-cluster-name>"

az aks get-credentials \
  --resource-group $MY_RESOURCE_GROUP_NAME \
  --name $MY_AKS_CLUSTER_NAME

# ARC のインストール
NAMESPACE="arc-systems"
helm install arc \
  --namespace "${NAMESPACE}" \
  --create-namespace \
  oci://ghcr.io/actions/actions-runner-controller-charts/gha-runner-scale-set-controller

# ランナースケールセットの構成
INSTALLATION_NAME="arc-runner-set"
NAMESPACE="arc-runners"
GITHUB_CONFIG_URL="https://github.com/<your-username>/<your-repo-name>"
GITHUB_PAT="<your-personal-access-token>"
helm install "${INSTALLATION_NAME}" \
  --namespace "${NAMESPACE}" \
  --create-namespace \
  --set githubConfigUrl="${GITHUB_CONFIG_URL}" \
  --set githubConfigSecret.github_token="${GITHUB_PAT}" \
  oci://ghcr.io/actions/actions-runner-controller-charts/gha-runner-scale-set

# ポッドの確認
kubectl get pods -n arc-systems
NAME                                    READY   STATUS    RESTARTS   AGE
arc-gha-rs-controller-b9848b555-k8z6r   1/1     Running   0          12m
arc-runner-set-754b578d-listener        1/1     Running   0          3m10s
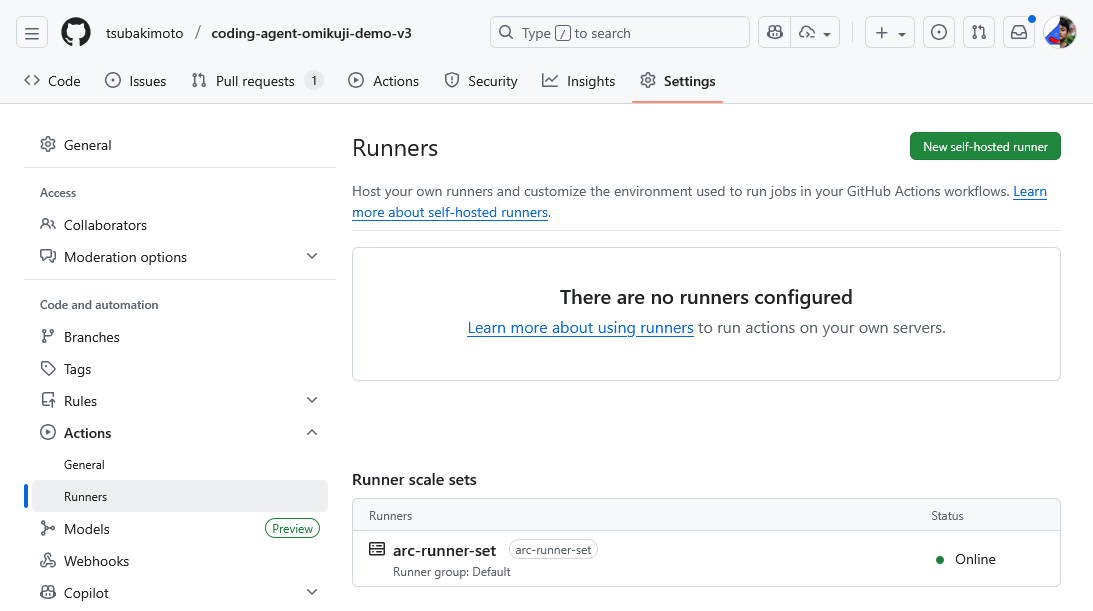
構築が完了したら、GitHub リポジトリの Settings > Actions > Runners から Self-hosted Runner が登録されていることを確認します。
Copilot coding agent で Self-hosted Runner を使用する構成
続いて、Copilot coding agent で Self-hosted Runner を使用するための設定を行います。
Copilot coding agent ではワークフローファイルを用意することで、エージェントの開発環境をカスタマイズすることができます。
具体的には .github/workflows/copilot-setup-steps.yml というファイルを作成し、開発環境の事前セットアップのためのコマンドを記述します。
ジョブのランナーに Self-hosted Runner を指定することで、 Copilot coding agent が Self-hosted Runner 上で動作するようになります。
従来のように GitHub-hosted Runner を使用する場合は、このように記述します。
name: "Copilot Setup Steps"

on:
  # 中略

jobs:
  copilot-setup-steps:
    runs-on: ubuntu-latest
Self-hosted Runner を使用する場合は、 runs-on にランナースケールセットの名前を指定します。
name: "Copilot Setup Steps"

on:
  # 中略

jobs:
  copilot-setup-steps:
    runs-on: arc-runner-set
正しく設定できていれば、以下のように Self-hosted Runner 上で Copilot coding agent が動作することが確認できます。(例:接続時のログ)
$ kubectl get pods -n arc-runners -w
NAME                                READY   STATUS              RESTARTS   AGE
arc-runner-set-qc5gv-runner-tv2vm   0/1     ContainerCreating   0          1s
arc-runner-set-qc5gv-runner-tv2vm   1/1     Running             0          2s
arc-runner-set-qc5gv-runner-tv2vm   0/1     Completed           0          35s
arc-runner-set-qc5gv-runner-tv2vm   0/1     Terminating         0          35s
arc-runner-set-qc5gv-runner-tv2vm   0/1     Completed           0          36s
arc-runner-set-qc5gv-runner-tv2vm   0/1     Completed           0          37s
arc-runner-set-qc5gv-runner-tv2vm   0/1     Completed           0          37s
しかし実際に動作するためには、2つの注意点があります。
【注意】Copilot coding agent のファイアウォールの無効化
実際に Issue を Copilot にアサインして、Self-hosted Runner 上でタスクを実行してみますが、以下のように Copilot coding agent のファイアウォールに関するエラーが発生します。
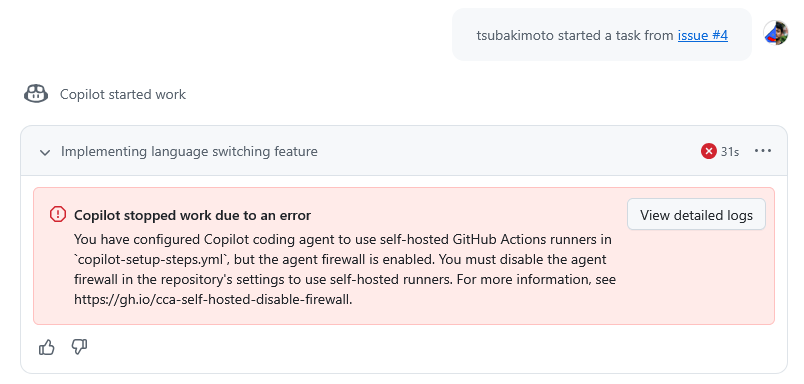
You have configured Copilot coding agent to use self-hosted GitHub Actions runners in
copilot-setup-steps.yml, but the agent firewall is enabled. You must disable the agent firewall in the repository's settings to use self-hosted runners. For more information, see https://gh.io/cca-self-hosted-disable-firewall.
ドキュメントは以下になります。
ドキュメントによると、Copilot coding agent で Self-hosted Runner を使用する場合は、ファイアウォールを無効化する必要があるようです。
無効化するには、GitHub リポジトリの Settings > Copilot > Coding agent > Internet access で設定を変更します。

【注意】ワークフローに環境変数の設定を追加
ファイアウォールを無効化したことで Copilot coding agent の作業が進むようにはなりましたが、また別のエラーが発生しました。

ワークフローのログから詳細を確認すると、以下のエラーが発生していました。
CodeQL asset ID: 304101132
Error ensuring CodeQL: Error: GitHub host is required
Error GitHub host is required
ERROR: {
  "name": "Error",
  "text": "GitHub host is required",
  "stack": "Error: GitHub host is required\n    at demandGitHubHost (/home/runner/_work/_temp/******-action-main/src/settings/demand.ts:45:15)\n    at async (/home/runner/_work/_temp/******-action-main/src/tools/codeql/download-codeql.ts:45:18)\n    at async (/home/runner/_work/_temp/******-action-main/src/tools/codeql/download-codeql.ts:93:41)\n    at async async (/home/runner/_work/_temp/******-action-main/src/tools/codeql/download-codeql.ts:135:15)\n    at async undefined (/home/runner/_work/_temp/******-action-main/src/tools/codeql/codeql-checker.ts:61:9)\n    at async async (/home/runner/_work/_temp/******-action-main/src/agents/config.ts:172:100)\n    at async async (/home/runner/_work/_temp/******-action-main/src/agents/config.ts:201:12)\n    at async _0x481b75 (/home/runner/_work/_temp/******-action-main/src/agents/agentPrimitives.ts:373:41)\n    at async _0x2976a7 (/home/runner/_work/_temp/******-action-main/src/agents/hostedAgents.ts:192:24)\n    at async async (/home/runner/_work/_temp/******-action-main/src/index.ts:302:15)",
  "message": "GitHub host is required",
  "skipReport": false,
  "isVisionFlow": false
}
Committing and pushing any changes that occurred before error occurred.
ワークフローのなかで CodeQL を使用しようとしているが、「GitHub host」が指定されていないためにエラーが発生しているようです。
このエラーについての情報があまり見つからなかったのですが、こちらの Discussions が参考になりました。
2つの解決策が紹介されていましたが、今回は以下の方法で解決しました。(コメントを引用します)
Add an GITHUB_HOST env variable that will make the download possible (but 700Mb each time, cost of network / time not great) (warning env on the job is not working, you have to create a step with echo "GITHUB_HOST=github.com" >> $GITHUB_ENV )
.github/workflows/copilot-setup-steps.yml に 環境変数 GITHUB_HOST を設定するステップを追加します。
私が検証した YAML ファイル全体は以下のようになり、最後のステップで環境変数を設定しています。
name: "Copilot Setup Steps"

on:
  workflow_dispatch:
  push:
    paths:
      - .github/workflows/copilot-setup-steps.yml
  pull_request:
    paths:
      - .github/workflows/copilot-setup-steps.yml

jobs:
  copilot-setup-steps:
    runs-on: arc-runner-set

    permissions:
      contents: read

    steps:
      - name: Checkout code
        uses: actions/checkout@v5

      - name: Set up Node.js
        uses: actions/setup-node@v4
        with:
          node-version: "20"
          cache: "npm"

      - name: Install JavaScript dependencies
        run: npm ci

      - name: Add GitHub host environment variable
        run: echo "GITHUB_HOST=github.com" >> $GITHUB_ENV
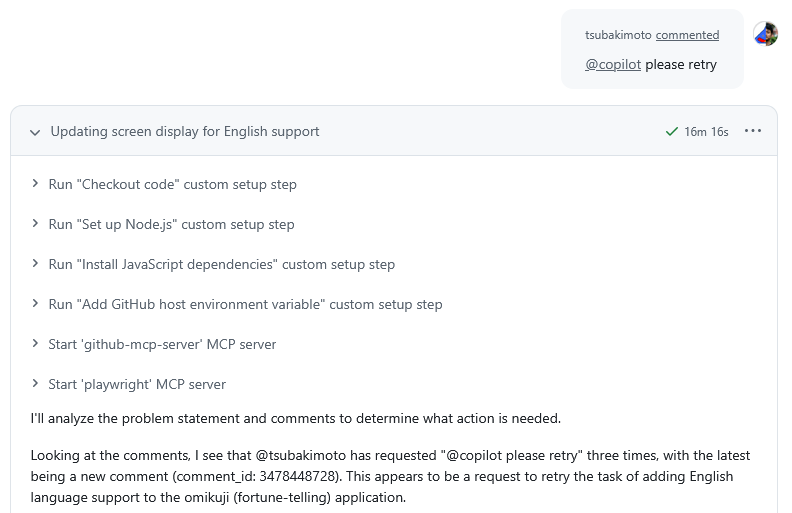
これで無事に Self-hosted Runner 上で Copilot coding agent が動作するようになりました。
Copilot coding agent はどのランナーを使うといいのか
GitHub-hosted Runner でも Self-hosted Runner でも、Copilot coding agent が動作するようになりました。
では、実際にどちらのランナーを使うとよいのでしょうか。
まず、どちらか片方だけが正解というわけではありません。
考え方としては GitHub Actions におけるランナー種別の選択と同様で、プロジェクトの要件や利用シーンに応じて選択するのがよいでしょう。
- GitHub-hosted Runner が適しているケース
- 特別な環境を必要としない
- 特別な環境を必要とするが、セットアップが簡単な場合
- Self-hosted Runner が適しているケース
- 特別な環境を必要とする(例:特定なOS、ミドルウェア、ネットワークなど)
- 特別な環境を必要としないが、実行時間が膨大のためにコスト削減したい
いずれにせよ、選択肢が増えたことはユーザーにとって良いことだと思います。
個人的には ARC を使用しない Self-hosted Runner のサポートも今後期待したいところです。
サービス一覧 www.alterbooth.com www.alterbooth.com www.alterbooth.com


